Device Operations
The Device Operations allows you to configure specific values for Sensor 3 racks, ETC Source4 LED, Desire and ColorSource fixtures. To access the Device Operations dock, select one of these devices from the Workspace. From the View menu, select Docks > Device Operations.
Sensor 3 Rack
For Sensor 3 racks, you can use the Device Operations dock to set levels, check dimmers and manage presets and rig check looks.
Note: Each tab in the Sensor 3 Device Operations dock has a selection list for Space. If your system has more than one Net3 Space, ensure that you have the appropriate space selected before making changes.
The Set Levels tab has two sub-tabs that you can use to set levels at your Sensor 3 rack. The Set Levels sub-tab is selected by default and allows you to set dimmer levels for the circuits in your spaces.
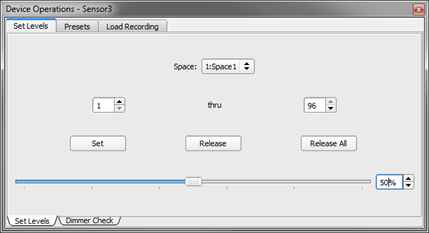
To set levels from the Set Levels sub-tab:
- Set your range of circuits using the number thru number fields
- Use the slider or percentage field to set the desired level for your circuits
- Click Set to set the circuits in the specified range to the currently selected level
- Click Release to release the set levels on the selected range of circuits
- Click Release All to release set levels for all circuits in the selected space
From the Set Levels sub-tab, select the range of circuits for which you want to set a level. Use the slider or the percentage field to adjust the level for the selected range of circuits.
Dimmer Check
The Dimmer Check sub-tab allows you to run through the circuits in a space to test their output at a given percentage.
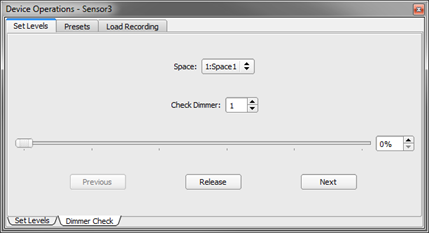
Consider the following when using the Dimmer Check sub-tab:
- Enter the circuit number that you want to check in the Check Dimmer field
- Use the slider or percentage field to set the desired level at which to check your circuit
- Use the Previous and Next buttons to step through the circuits sequentially - clicking these buttons sets the next or previous circuit to the level selected
- Click Release to release the set level for the currently selected circuit
The Presets tab allows you to manage your presets for your Sensor 3 rack.
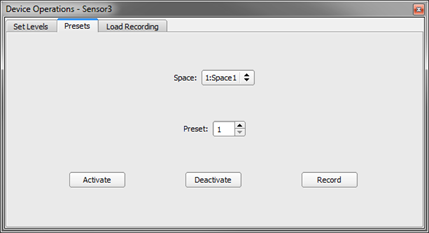
Consider the following when using the Presets tab:
- Enter the preset you want to work with (1-64) in the Preset field
- You can activate, deactivate and record the currently selected preset using the respective buttons
The Load Recording tab allows you to manage your rig check.
Note: The Rig Check features are only available if the rack property AF Enabled is set to Yes.
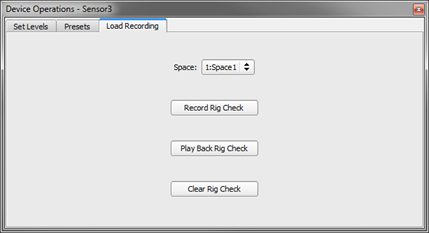
The following buttons are available:
- Record Rig Check - Record a rig check preset
- Play Back Rig Check - Run the rig check preset
- Clear Rig Check - Clear the recorded rig check
Supported ETC Fixtures
For ETC Source4 LED, Desire, and ColorSource fixtures, you can use the Device Operations dock to manage presets and sequences.
From the Presets tab, you can play and stop presets on your fixture as well as live and blind edit the presets on your device.
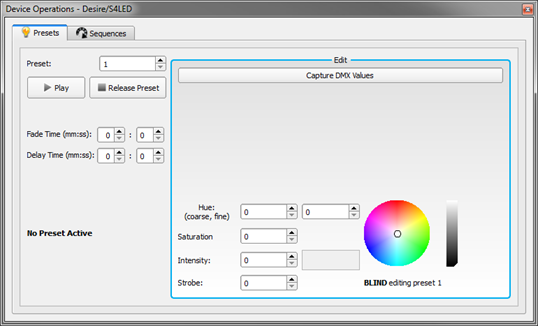
Consider the following when working with presets:
- You can select the preset number (1-12) and then define Fade Time and Delay Time in the format mm:ss
- Enter values for Hue (course and fine), Saturation, Intensity and Strobe
- Or select a color from the color wheel to auto-populate the Hue and Saturation fields and use the slider on the right of the color wheel to adjust the Intensity field
- If a preset is active while you are changing color, the preset is edited in real-time and the changes are immediately visible. If the preset is not active, the changes are stored until the next time the preset is played back.
- The [Capture DMX Values] button will snapshot the current DMX values into the selected preset. The Hue, Saturation and Intensity values are updated to reflect the information being sent to the fixture over DMX.
Note: Desire and Source4 LED fixtures must be set to HSI mode and ColorSource fixutres must be set to RGB or 5 Channel mode if you want to capture presets from Device Operations. The [Capture DMX Values] button is disabled when your fixtures are note set to an appropriate mode.
From the Sequences tab, you can play and stop sequences on your device. Select a sequence to edit from the Sequence field (1-12).
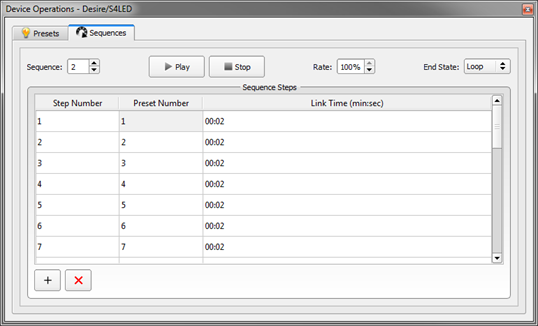
Use the ![]() and
and ![]() buttons to add and remove steps to the sequence and then associate your presets with your steps. You can also select rate (%) of the sequence and the end state (Loop or Bounce). Finally, enter a value for Link Time for each step.
buttons to add and remove steps to the sequence and then associate your presets with your steps. You can also select rate (%) of the sequence and the end state (Loop or Bounce). Finally, enter a value for Link Time for each step.
Once you have added the steps and associated presets, click Play to view the sequence.